Embarking on the journey of amateur radio is an adventure filled with discovery, challenges, and a sense of achievement. One of the most exciting milestones for many radio enthusiasts is making the first contact via a satellite. This experience not only broadens the technical horizons but also connects hams worldwide through the marvels of space communication. In this comprehensive guide, we delve into the detailed story of a first satellite contact, exploring the technical setup, the steps involved, and tips to successfully connect with amateur satellites.
- Introduction to Amateur Radio Satellites
- Types of Amateur Satellites
- Preparing for Your First Satellite Contact
- Equipment Needed
- Understanding Satellite Passes
- Step-by-Step: Making Your First Satellite Contact
- 1. Setting Up Equipment
- 2. Planning the Pass
- 3. Tuning the Transceiver
- 4. Tracking and Aiming the Antenna
- 5. Listening and Calling CQ
- 6. Completing the Contact
- Technical Formulas and Calculations for Satellite Communication
- 1. Doppler Shift Calculation
- 2. Antenna Gain Calculation
- Best Practices and Tips for Successful Satellite Contacts
- Common Challenges and Troubleshooting
- The Reward of Satellite Communication
- Further Resources and Learning
Introduction to Amateur Radio Satellites
Amateur radio satellites have revolutionized the way enthusiasts communicate across distances that can span the entire globe. These satellites act as repeaters in space, relaying signals between operators separated by thousands of kilometers. The first amateur satellite, OSCAR-1, launched in 1961, marked the beginning of a new era in radio communication. Since then, hundreds of satellites have been launched, each providing unique opportunities for ham operators to experiment and connect.
Types of Amateur Satellites
- Linear Transponder Satellites: Allow multiple contacts simultaneously by using different frequency bands, enabling full-duplex communication.
- Orbital Repeaters: These function as space-based repeaters, receiving signals on one band and retransmitting on another.
- Data and Experimental Satellites: Focused on testing new communication protocols, digital modes, and scientific experiments.
Preparing for Your First Satellite Contact
Success in satellite communication hinges upon meticulous preparation. Comprehending the technical requirements, understanding satellite pass times, and choosing suitable equipment form the foundation for a successful contact.
Equipment Needed
| Item | Description |
|---|---|
| Ham Radio Transceiver | Preferably HF/VHF/UHF capable with frequency agility and narrowband modes. |
| Antenna System | Directional Yagi antennas, typically with multiple elements for VHF/UHF bands, mounted on rotators for tracking. |
| Antenna Rotator | Motorized device to aim the antenna accurately during satellite pass. |
| Tracking Software | Programs like SatPC32 or Orbitron to predict satellite passes and control antenna orientation. |
| Coaxial Cables & Connectors | Low-loss cables and high-quality connectors to minimize signal loss. |
| HEADSET or Speakers and Microphone | For clear audio during contacts. |
| Power Supply | Stable power sources to ensure reliable operation of equipment. |
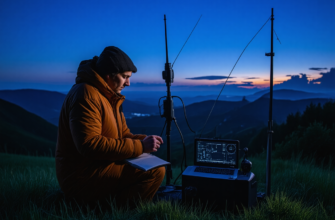
Understanding Satellite Passes
Satellite passes occur when the satellite moves above the horizon, providing an opportunity window for communication. Tools like Heavens-Above or N2YO help predict accurate pass times, elevation angles, and pass durations. Typically, the best communication window occurs during passes with high elevation angles, offering better signals and fewer obstructions.
Step-by-Step: Making Your First Satellite Contact
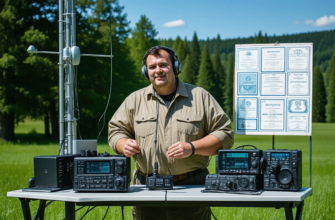
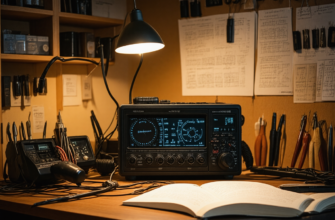
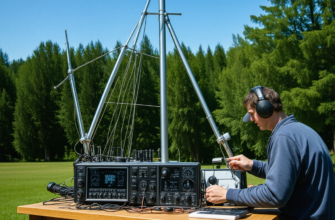
1. Setting Up Equipment
Begin by assembling the antenna system and mounting it on a rotator. Connect the transceiver via appropriate cables, ensuring all equipment is powered and configured for the desired frequency bands (commonly 2 meters and 70 centimeters). Install tracking software and calibrate the antenna’s orientation for initial positioning.
2. Planning the Pass
Using tracking software or pass prediction websites, identify upcoming satellite passes with good elevation angles and suitable windows for communication. Record the predicted pass start, maximum elevation, and end times to prepare accordingly.
3. Tuning the Transceiver
Set your radio to the satellite’s uplink and downlink frequencies. For example, a typical satellite might operate on 145.800 MHz (uplink) and 435.000 MHz (downlink). Adjust the radio for narrowband modes such as FM or SSB, depending on the satellite’s specifications.
4. Tracking and Aiming the Antenna
Use tracking software to calculate the satellite’s position in real-time, and manually or automatically rotate the antenna towards the predicted path. Fine-tune the aiming for maximum signal strength during the pass.
5. Listening and Calling CQ
Once the satellite is within view (above the horizon with good elevation), listen for existing signals. When clear, transmit a brief call, such as “CQ Satellite, this is [Your Callsign]” and wait for a response. Be patient, as many operators may be waiting for their turn.
6. Completing the Contact
If a contact is established, exchange signal reports and station details. Keep the communication concise due to limited pass time. After completing the exchange, listen for other stations and be ready to respond.
Technical Formulas and Calculations for Satellite Communication
1. Doppler Shift Calculation
The Doppler effect causes frequency shifts during satellite passes. The formula for Doppler shift is:
Δf = (v / c) × f0
- Δf — Frequency shift
- v — Relative velocity between satellite and ground station
- c — Speed of light (~299,792 km/s)
- f0 — Nominal frequency
For example, at 145.800 MHz, a relative velocity of 7.5 km/s results in a frequency shift of approximately 3.6 kHz, which needs to be compensated during communication.
2. Antenna Gain Calculation
The gain (G) of a Yagi antenna can be approximated by:
G (dBi) ≈ 10 × log10 [(N2 × λ2) / (4 × π × A)]
where:
- N — Number of elements
- λ — Wavelength
- A — Antenna’s physical aperture area
Best Practices and Tips for Successful Satellite Contacts
- Pre-Plan and Practice: Regularly practice tracking and tuning to become familiar with pass timings.
- Optimize Antenna Orientation: Use azimuth and elevation data from tracking software for precise aiming.
- Adjust for Doppler Effect: Shift your radio frequency slightly before the pass begins, and fine-tune during the contact.
- Record your contacts: Keep logs of every satellite contact, including dates, times, and signal reports.
- Participate in Nets and Groups: Engaging with online communities or local clubs can provide support and shared insights.
Common Challenges and Troubleshooting
| Issue | Possible Cause | Solution |
|---|---|---|
| Weak Signal | Incorrect antenna aiming or obstructions | Recalibrate antenna pointing, check for obstructions |
| Frequency Drift | Doppler effect not compensated, equipment instability | Adjust frequency pre- and during pass accordingly |
| Audio Clarity Issues | Poor microphone or audio settings | Check microphone connections, adjust volume and filters |
| No Response | Timing mismatch, or station is silent | Wait for next pass, or try calling again later |
The Reward of Satellite Communication
Sharing the story of a first satellite contact encapsulates the thrill of amateur radio—combining technical skill, patience, and the joy of connecting across distances through the vacuum of space. Each successful contact not only expands personal experience but also contributes to a global community of enthusiasts who explore and expand the horizons of radio communication. With the right equipment, preparation, and perseverance, your first satellite contact can become a memorable milestone and a stepping stone toward more ambitious amateur radio adventures.
Further Resources and Learning
- AMSAT Official Website — Tips, satellite information, and community forums.
- SatNOGS Project — Open-source satellite ground station networks for tracking and data sharing.
- German Amateur Radio Club — Extensive resources and guides in multiple languages.
In the end, the journey to the first satellite contact begins with curiosity and willingness to learn. As experience grows, so does the ability to explore new satellites, digital modes, and global communication networks—all through the enduring passion for amateur radio and the cosmos above.
Похожие записи:
 Celebrating a Milestone with My Radio Club: A Journey of Achievement and Community Spirit
  How a Simple Antenna Repair Sparked a Long-lasting Friendship – An Amateur Radio Journey
  The Future of Amateur Radio with Emerging Technologies
  How a Lost Radio Helped Reconnect a Community: The Power of Amateur Radio
  Lessons Learned from a Tough QSL Card Exchange: Enhancing Your Ham Radio Operations
  The Day I Assisted in a Search and Rescue Operation: An Amateur Radio Operator’s Perspective
  Memories from a Challenging QRP Expedition: Lessons, Triumphs, and Insights
  Experiencing the Magic of a Sporadic E Opening – An Amateur Radio Enthusiast’s Guide
  Effective Propagation Analysis Techniques Throughout the Year: Maximizing Ham Radio Performance
  Getting Started with Digital Modes like FT8 and PSK31: A Complete Guide for Amateur Radio Enthusiasts
  Latest Developments in Spectrum Licensing and Frequency Allocations: A Comprehensive Overview for Amateur Radio Enthusiasts
  Legendary Operators Who Inspired Me: The Unsung Heroes of Amateur Radio
  Using Software to Enhance Your Amateur Radio Experience: Unlocking New Possibilities
  Understanding Ham Radio Frequencies and Bands: A Comprehensive Guide for Amateur Radio Enthusiasts