For amateur radio operators, radio enthusiasts, and electronics hobbyists, building a personal antenna can be both a rewarding project and a crucial step in enhancing communication capabilities. Among the myriad types of antennas, the dipole antenna remains one of the most popular and straightforward designs, ideal for beginners and experienced operators alike. This guide offers a detailed, step-by-step process to create a reliable, efficient, and simple dipole antenna at home, using readily available materials and fundamental engineering principles.
- Understanding the Basics of Dipole Antennas
- What is a Dipole Antenna?
- How Does a Dipole Work?
- Why Choose a Dipole Antenna?
- Materials Needed for Construction
- Calculating the Length of Each Element
- Fundamental Formula
- Example Calculation
- Step-by-Step Construction Process
- 1. Prepare the Materials and Tools
- 2. Cut the Wires
- 3. Attach Insulators
- 4. Connect the Wires to the Feed Line
- 5. Install the Antenna
- 6. Grounding and Lightning Protection
- Optimizing the Dipole Antenna Performance
- 1. Tuning the Lengths
- 2. Height Above Ground
- 3. Orientation and Placement
- Additional Tips and Troubleshooting
- Common Issues and Solutions
- Enhancing Antenna Performance
- Safety Considerations
- Summary and Final Remarks
- Additional Resources
Understanding the Basics of Dipole Antennas
What is a Dipole Antenna?
A dipole antenna is a type of radio antenna consisting of two conductive elements, usually equal in length, oriented in a straight line. The antenna operates by transmitting or receiving radio frequency signals through oscillating electric currents in its elements. When properly installed, a dipole provides a balanced radiation pattern, making it an efficient choice for many amateur radio applications.
How Does a Dipole Work?
The core principle behind a dipole antenna is the transmission of radio frequency energy through an electrical current that oscillates in the antenna elements. These oscillations generate electromagnetic waves that radiate outward into free space. Conversely, incoming radio signals induce currents in the antenna elements, which are then transmitted to the receiver.
Why Choose a Dipole Antenna?
- Ease of construction: Simple design using basic materials
- Cost-effective: Minimal investment required
- Versatility: Suitable for multiple frequency ranges
- High performance: Good radiation pattern and gain in many configurations
- Adaptability: Can be mounted at various heights and structures
Materials Needed for Construction
| Material | Description | Quantity |
|---|---|---|
| Wire (copper or aluminum) | Conductive element; gauge depends on frequency | Approx. 15-20 meters (per antenna element) |
| Insulators | To prevent shorts where the wire is fixed | 2 units |
| Coaxial cable | Feed line connecting the antenna to the radio | 1 piece, length varies |
| Balun (optional but recommended) | Devices to balance the feed impedance | 1 unit |
| Joints/Connectors | For securing wires and connecting coax | Various |
| Mounting hardware | Poles, hooks, or masts for installation | As needed |
| Tools | Wire cutters, pliers, drill, screwdriver, etc. | Set of basic tools |
Calculating the Length of Each Element
Fundamental Formula
The length of each element in a dipole depends on the frequency (f) you intend to operate at. The basic formula for determining the length of each element is:
L (meters) = 142.5 / f (MHz)
Where:
- L – total length of the dipole (both sides combined)
- f – frequency of operation in megahertz (MHz)
Since a dipole consists of two equal sections, each element length is:
L_element = L / 2
Example Calculation
Suppose the target frequency is 7 MHz (which is common for amateur radio). Then:
L_total = 142.5 / 7 = 20.36 meters
L_element = 20.36 / 2 ≈ 10.18 meters
This means each wire segment should be approximately 10.18 meters long.
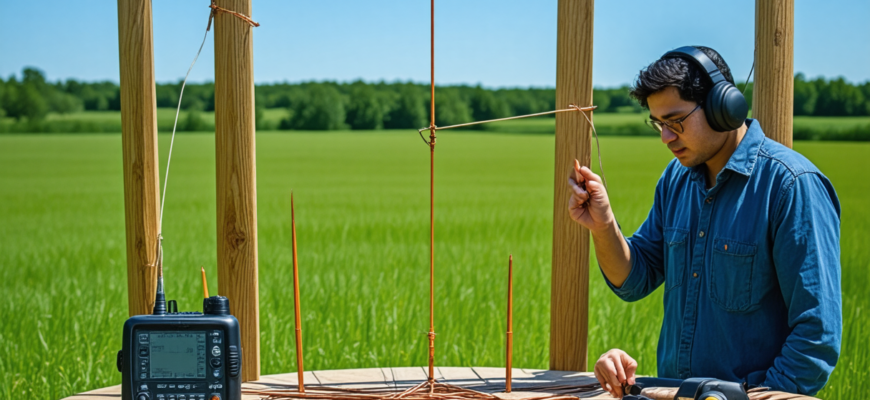
Step-by-Step Construction Process
1. Prepare the Materials and Tools
Gather all necessary materials: wires, insulators, coaxial cable, connectors, balun (if applicable), mounting hardware, and tools. Ensure the workspace is clean and organized.
2. Cut the Wires
Based on calculations, cut two lengths of wire, each approximately equal to the length of the required element, with some margin for adjustments. Typically, an extra 5-10% is recommended to accommodate measurement tolerances and soldering.
3. Attach Insulators
Secure insulators at each end of the wires. These insulators will prevent the wires from shorting to each other or the mounting structure, and facilitate hanging the antenna.
4. Connect the Wires to the Feed Line
Attach each wire to the center conductor of the coaxial cable. If using a balun, connect it at this junction to reduce common-mode currents and improve performance. Ensure solder joints are solid and insulated if necessary.
5. Install the Antenna
Choose a suitable location, preferably high above ground in as straight a line as possible, avoiding obstructions. Mount the antenna using poles, trees, or dedicated supports, ensuring it is taut and secure.
6. Grounding and Lightning Protection
Proper grounding is essential for safety and performance. Use grounding rods and lightning arresters as recommended by local regulations and best practices.
Optimizing the Dipole Antenna Performance
1. Tuning the Lengths
Fine-tune the lengths of each element for best resonance at the desired frequency. Use an SWR meter or antenna analyzer to measure standing wave ratio (SWR). Adjust the wire lengths in small increments until optimal SWR is achieved.
2. Height Above Ground
The height of the antenna significantly impacts its radiation pattern and efficiency. Ideally, hang the dipole at least half a wavelength above ground. For example, if operating at 7 MHz (λ ≈ 42.86 meters), placing the antenna at 10-15 meters height yields good results.
3. Orientation and Placement
Orient the dipole in a direction that maximizes signal strength towards desired communication targets. Avoid metal structures and large trees that can detune or shadow the antenna.
Additional Tips and Troubleshooting
Common Issues and Solutions
- High SWR readings: Check and trim the wire lengths. Ensure all connections are solid and insulated properly.
- Weak signal reception or transmission: Increase the height or reposition the antenna to reduce losses.
- Interference or noise: Use a good quality coax and ensure proper grounding.
Enhancing Antenna Performance
- Use a balun at the feed point to transition from balanced to unbalanced line.
- Implement radial wires below the antenna to improve ground conductivity.
- Experiment with different orientations and heights to find the optimal setup.
Safety Considerations
Always observe safety when installing antennas, especially near power lines. Maintain safe distances and turn off power sources during installation. Proper grounding and lightning protection are essential to prevent electrical hazards.
Summary and Final Remarks
Constructing a simple dipole antenna is an accessible and rewarding project for amateur radio enthusiasts. By understanding the fundamental principles, accurately calculating the element lengths, and carefully installing the antenna, hobbyists can significantly improve their radio communication experience. Whether for DXing, local communications, or experiments, the dipole remains a reliable and versatile choice for home builders and radio operators.
Additional Resources
Building a dipole antenna at home combines practical skills with fundamental radio theory, resulting in an effective and economical solution for enhancing amateur radio operations. With patience, precise measurement, and proper installation, any enthusiast can create a functional and efficient dipole antenna that will serve for years to come.
Похожие записи:
 Building a Simple, Low-Cost Antenna Tuner at Home: A Comprehensive Guide for Amateur Radio Enthusiasts
 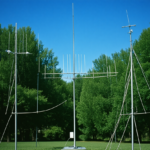 Basic Antenna Types and Their Uses for Beginners: A Comprehensive Guide for Amateur Radio Enthusiasts
  How to Build Your Own Homemade QRP Transceiver: A Comprehensive Guide for Amateur Radio Enthusiasts
  Ultimate Guide: Tips for Setting Up Your Home Radio Station
 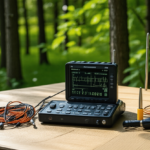 Portable Antenna Analyzers for Precise Tuning: The Ultimate Guide for Amateur Radio Enthusiasts
 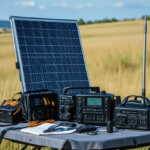 Build Your Own Portable Solar Power Setup for Radio Operations: A Comprehensive Guide
 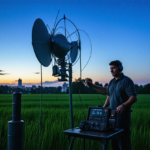 High-Gain Antennas for Long-Distance Communication: Unlocking Extended Reach in Amateur Radio
  Mastering Regulatory Changes: A Comprehensive Guide for Amateur Radio Enthusiasts
  Integrating Software-Defined Radio into Your Daily Operations: A Comprehensive Guide for Amateur Radio Enthusiasts
  Developing Effective Emergency Preparedness Plans with Ham Radio: A Comprehensive Guide for Amateur Radio Enthusiasts
 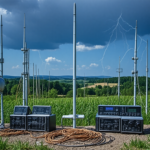 Ultimate Guide to Lightning Protection Gear for Your Radio Setup
 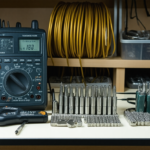 Essential Tools for Cable and Connection Maintenance: A Complete Guide for Amateur Radio Enthusiasts
  Comprehensive Review of the Latest Transceiver Models on the Market: Innovations and Performance for Amateur Radio Enthusiasts
 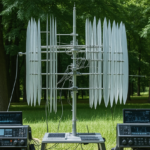 Innovative Antenna Designs for Enhanced HF Performance
 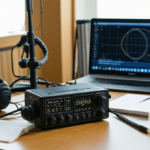 Top Choices for Budget-Friendly Amateur Radio Equipment: A Comprehensive Guide for Hobbyists
 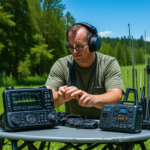 Portable Spectrum Analyzers for Field Frequency Testing: A Complete Guide for Amateur Radio Enthusiasts