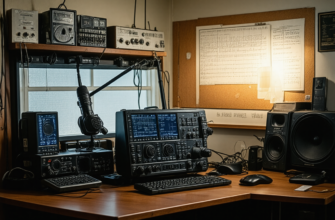
Amateur radio has long been a fascinating hobby that combines technical skills, communication, and a passion for electronics. However, even the most experienced radio operators encounter issues with their equipment from time to time. Whether it’s poor signal quality, connectivity problems, or malfunctioning components, understanding how to troubleshoot common radio problems is essential for maintaining optimal performance and avoiding frustration.
This comprehensive guide aims to provide straightforward, effective troubleshooting tips for common issues that amateur radio enthusiasts face. From checking basic connections to advanced diagnostics, this article will help you identify and resolve problems quickly and efficiently, ensuring that your radio setup works smoothly and reliably.
- Understanding the Basics of Radio Troubleshooting
- Common Radio Issues and How to Troubleshoot Them
- 1. Poor Transmission or Reception
- Step 1: Check Antenna Connections
- Step 2: Verify Antenna Orientation and Placement
- Step 3: Test with a Known Good Antenna
- Step 4: Check Transmitter Power Output
- 2. No Transmission or Cannot Transmit
- Step 1: Confirm Power Supply
- Step 2: Check Keying and Microphone
- Step 3: Ensure Transmit Settings Are Correct
- Step 4: Test Transmit with a Dummy Load
- 3. Interference and Noise Issues
- Step 1: Identify the Source
- Step 2: Improve Grounding
- Step 3: Use Filters
- 4. Hardware Malfunctions
- Step 1: Conduct a Visual Inspection
- Step 2: Test Power Supply
- Step 3: Reset or Reinitialize Settings
- Step 4: Consult Manufacturer or Repair Experts
- Tools for Effective Troubleshooting
- Additional Tips to Maintain Radio Equipment
- Summary of Troubleshooting Steps
Understanding the Basics of Radio Troubleshooting
Before diving into specific issues, it’s important to grasp some fundamental principles of radio troubleshooting:
- Identify the problem clearly. Be specific about what’s not working or what’s abnormal.
- Use systematic approaches. Check each component step-by-step rather than randomly replacing parts.
- Have the right tools. Basic tools include a multimeter, SWR meter, and sometimes a signal generator or antenna analyzer.
- Refer to the manual. Manufacturer manuals provide vital technical info specific to your model.
Common Radio Issues and How to Troubleshoot Them
1. Poor Transmission or Reception
One of the most frequently encountered issues is weak signal quality. This can manifest as static, low volume, or inability to connect with other stations. Here are actionable steps to troubleshoot:
Step 1: Check Antenna Connections
- Ensure all cables are securely connected. Loose or corroded connectors can drastically reduce signal quality.
- Inspect the antenna for physical damage, dents, or corrosion.
- Confirm that the antenna is appropriate for your frequency band.
Step 2: Verify Antenna Orientation and Placement
- Place the antenna in an elevated location free from obstructions.
- Aim directional antennas towards the intended transmission area.
Step 3: Test with a Known Good Antenna
- Swap your current antenna with a tested, working antenna to determine if the issue is antenna-related.
Step 4: Check Transmitter Power Output
- Use an SWR meter to measure Standing Wave Ratio (SWR). An SWR below 2:1 is ideal for most amateur radio applications.
- If SWR is high, adjust or replace the antenna accordingly.
2. No Transmission or Cannot Transmit
This can be caused by various factors, from power supply issues to hardware malfunctions. Follow these steps:
Step 1: Confirm Power Supply
- Ensure the radio is powered on and the power supply is functioning correctly.
- Check for blown fuses or loose power connections.
Step 2: Check Keying and Microphone
- Verify that the microphone is properly connected and the microphone switch isn’t muted or malfunctioning.
- Test with different microphones if possible.
Step 3: Ensure Transmit Settings Are Correct
- Inspect the frequency, mode, and transmit power settings.
- Confirm that the radio is not stuck on receive-only mode or a protection mode.
Step 4: Test Transmit with a Dummy Load
- Connect the radio to a dummy load and attempt transmission.
- If the dummy load transmits normally, the problem is likely with the antenna or feed line.
3. Interference and Noise Issues
Interference can severely degrade radio performance. To troubleshoot noise and interference:
Step 1: Identify the Source
- Turn off nearby electronic devices to see if noise diminishes.
- Use a portable receiver to locate sources such as fluorescent lights, computers, or power lines.
Step 2: Improve Grounding
- Ensure your radio and antenna system have proper grounding to reduce electrical noise.
- Use a grounding rod or connect to a proper ground circle as recommended.
Step 3: Use Filters
- Install RF filters or noise suppressors in your feed line or power supply.
- Use bandpass filters tuned to your operating frequency where appropriate.
4. Hardware Malfunctions
Sometimes, the root cause is a hardware defect or failure. To diagnose such issues:
Step 1: Conduct a Visual Inspection
- Look for burnt components, corrosion, loose wires, or broken parts inside the radio.
Step 2: Test Power Supply
- Ensure the voltage supplied matches the radio’s specifications.
- Use a multimeter to verify voltage stability during operation.
Step 3: Reset or Reinitialize Settings
- Perform a factory reset if possible to eliminate software issues.
Step 4: Consult Manufacturer or Repair Experts
- If hardware malfunction persists, contact technical support or a qualified repair technician.
Tools for Effective Troubleshooting
Having the right tools can significantly simplify the process of diagnosing and fixing radio issues. Essential tools include:
| Tool | Description |
|---|---|
| Multimeter | Measures voltage, current, and resistance, essential for diagnosing power and component issues. |
| SWR Meter | Assesses the standing wave ratio, crucial for antenna tuning and signal quality. |
| Antenna Analyzer | Provides detailed information on antenna resonance and impedance. |
| Signal Generator | Helps test and calibrate radio receivers and transmitters. |
| Basic Soldering Kit | For repair or replacement of internal components. |
Additional Tips to Maintain Radio Equipment
- Regularly inspect and clean connections and contacts. Dust, dirt, and corrosion can impair performance.
- Keep firmware and firmware drivers updated. Improve stability and fix bugs.
- Store equipment in a dry, stable environment. Prevent moisture damage.
- Perform routine calibration and testing. Ensure your equipment operates at peak efficiency.
Summary of Troubleshooting Steps
In summary, resolving common radio issues involves a methodical approach:
- Identify and clearly define the problem.
- Check all physical connections and components.
- Verify settings and configurations.
- Test with known-good components or external equipment.
- Use diagnostic tools to analyze performance.
- Consult manuals and technical support if needed.
- Perform maintenance and preventive measures regularly.
Effective troubleshooting is essential for maintaining reliable amateur radio operations. Understanding the common issues, knowing the right steps to diagnose them, and possessing the necessary tools will significantly empower radio enthusiasts to resolve problems quickly. Although some issues may require professional repair, most routine problems can be addressed through systematic approaches outlined in this guide. Consistent care and proper setup will ensure that your radio gear provides years of enjoyable service.
Remember, patience and attention to detail are key. With practice, troubleshooting will become an intuitive part of managing your amateur radio station, leading to smoother operations and better communication experiences.
Похожие записи:
 Effective Troubleshooting Guide for Common Radio Hardware Issues in Amateur Radio
  How to Build a Simple Dipole Antenna at Home: A Comprehensive Guide for Amateur Radio Enthusiasts
  Ultimate Guide: Tips for Setting Up Your Home Radio Station
  Building a Simple, Low-Cost Antenna Tuner at Home: A Comprehensive Guide for Amateur Radio Enthusiasts
  How to Choose Your First Amateur Radio Transceiver: Essential Tips for Beginners
  Ultimate Guide to Upgrading Your Amateur Radio Station with New Gear: Top Tips and Strategies
  Effective Tips for Organizing Successful Ham Radio Contests: A Comprehensive Guide
  Ultimate Guide: Best Practices for Maintaining and Extending the Lifespan of Your Radio Equipment
  Mastering Your Amateur Radio Antenna: Comprehensive Guide to Tuning and Testing
  Mastering DXing: Expert Tips for Contacting Rare Amateur Radio Stations
  Essential Tools for Cable and Connection Maintenance: A Complete Guide for Amateur Radio Enthusiasts
  Building a Portable Ham Radio Station for Outdoor Expeditions: The Ultimate Guide
  How to Build Your Own Homemade QRP Transceiver: A Comprehensive Guide for Amateur Radio Enthusiasts
  Ultimate Guide: Best Practices for Setting Up a Remote Radio Station Accessible Worldwide
  Getting Started with Digital Modes like FT8 and PSK31: A Complete Guide for Amateur Radio Enthusiasts
  Basic Antenna Types and Their Uses for Beginners: A Comprehensive Guide for Amateur Radio Enthusiasts